Monday 21 February 2011

Toshiba Satellite A75 failed power jack workaround

Today I received an email from Tony Sakariya (tsakariyaATyahooDOTcom) who was experiencing a problem with the power jack on his Toshiba Satellite A75 laptop. He’s been able to fix the problem by relocating the power jack outside the laptop case away from the system board.

I would like to share with others a tip for repairing their Toshiba A75 laptop for the DC Jack and battery charge problem.
I have a Toshiba A75-S209 for a year now. After the first 3 months it developed the exact same problem. Battery would not charge and I had to twist and turn the power jack to make the connection. Since it was in warranty, I returned it and they repaired and sent it back to me. The problem recurred again after about 4 months and I sent it again and they repaired it and worked fine for 5 more months and it failed. This is a design flaw with Toshiba. Now that I am out of warranty, I decided to repair it myself. Your guide for dismantling A75 was awesome. Thanks for the info. Now here is what I want to share with others. Resoldering the power jack with a new one does solve the problem for a while but it will reoccur. Hence I decided to bring out a wire with the Jack outside. Of course it looks dirty but it is a permanent solution. I am attaching the photo of the repair I did. I got the DC jack from ebay and insulated it with a electrical insulation tape. Now it is working fine, I do the connection and disconnection on the dangling power jack outside the laptop and hence no chance of breaking the soldering outside.
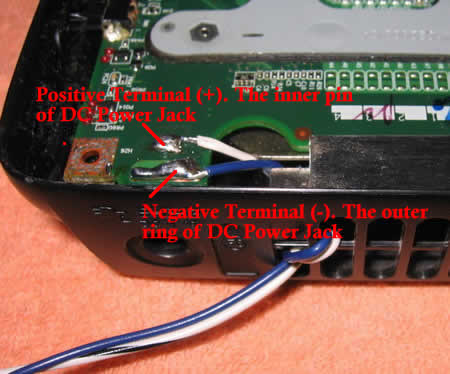

Laptop failed power jack fix

• Coil the pair of wire one round through the ventilation grill before taking it out as shown in the picture above. This is to prevent any external shock or force being directly transmitted to the soldering joints.
• Now we need to connect a new DC Jack to other end of the wire. I purchased the new DC jack from here for a price of $6. Shown in the picture above the white wire is the positive terminal (+) and hence must connect to the inner ring of the DC Jack. Similarly the blue wire being the negative terminal (-) should connect to the outer ring of the DC jack. Refer the picture below on how the wires are soldered to the DC Jack. Be careful not to short the leads as they are very close.
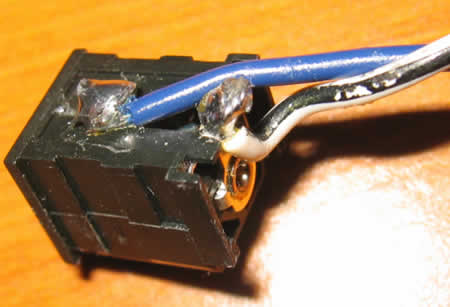
Power Plug Fix
• Now neatly wind a round of insulation tape over the wire and especially on the exposed DC Jack exterior. This will prevent any short-circuit and also give a better appearance.
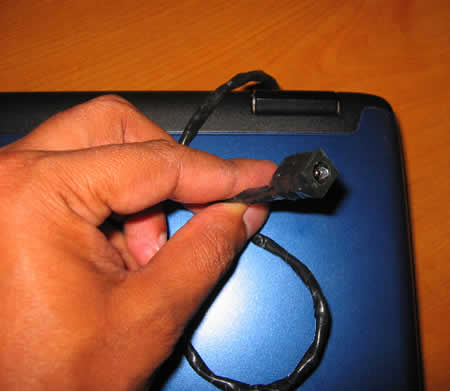
New Power Jack Assembled
Toshiba Satellite A70/A75. Disassembly guide with pictures.
Valued Comments.
Submitted by Binney:
The workaround relocates the jack externally. When I did this, a short occurred between the metal casing on the top cover (the one removed with the guitar pick). This happens if the solder repair is too tall. I covered my repair with electrical insulation tape and that fixed the problem. It took me quite some time to figure out where the short was and would like to save others the headache.

Comments #282, 286 submitted by Jake and John:
Size N: DC Power Jack #274-1576 from radioshack works perfect and looks great. Costs $2.99, easier to solder, snugger fit, 5.5mm O.D. x 2.5mm I.D.
Here are some pictures of the end result of the repair with
the Radio Shack type jack. I added one of those quick release
key holder that I had lying around as a retention holder.
Here is what it looks like unplugged: Power tip unplugged.
Here is what it looks like with the adapter plugged in and
the key holder reattached: Power tip plugged.

                                                                                   by laptoprepair101
Laptop turns on for a few seconds and then shuts down. No video appears on the screen.

Today I was able to fix a “dead” notebook simply by reseating connectors. The customer brought in Compaq nx5000 notebook with the following complaint:
“Laptop shuts down on power up. When the power button is pushed, the laptop flashes green lights for several seconds and then powers down. Unit will not stay on with battery or when plugged in”.
I plugged the AC adapter and tried to turn on the laptop. After I pushed on the power button, fans started spinning and were active for a few seconds and laptop just turned itself off. The video never came on. I tried to power it on for a few times with the same result.
Here is how I fixed it.
First of all I tried simple stuff: remove the battery and start the laptop with AC adapter plugged in, reseat and swap the memory module, remove the hard drive, the DVD drive, the wireless card. Nothing helped to start the laptop normally. After that I went a little bit further. I opened up the laptop case, removed the LCD screen assembly and reseated the video card and… Surprise, surprise, the laptop started fine with an external monitor attached. Just in case I restarted it 3-4 times and each time I got video on the screen. After I assembled everything back, one more surprise was waiting for me. The laptop failed to boot again with the same symptoms. So, the only part that I added before it failed was the LCD screen assembly. I unplugged the video cable from the system board and the laptop started fine again with the external monitor. Now I know that the problem is somewhere inside the display assembly (of course, if the video connector on the system board is fine). The next logical step would be opening up the LCD display assembly and check if all connectors are seated properly. Bingo!!! I wasn’t very surprised, but I was very happy. The video cable was half-way out from the connector on the back of the LCD screen. The laptop started perfectly fine as soon as I plugged the video cable back in place. Fixed!
That was my first experience when improperly plugged video cable prevented entire system from booting.

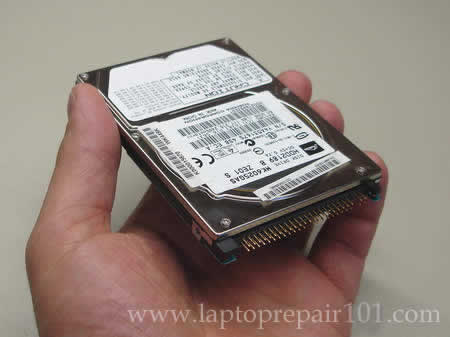
Very strange hard drive failure symptoms

A few days ago I had to repair a notebook with symptoms that didn’t look like a hard drive failure at all. But the problem was fixed after I replace the hard drive.
Hard drive failure
It was Toshiba Satellite A70-S249 notebook with the following problem.
When I press on the power button, the laptop starts up as usual and a red Toshiba logo appears on the screen. After a moment the logo disappears and the screen turns black without any faint image and flashing cursor. The blue light around the power button stays on and fans continue to spin normal but nothing appears on the screen. I noticed that the hard drive LED blinks green on the startup and after that shows no activity at all. After a closer inspection I noticed that the screen is not completely black (like dead black), it didn’t have any image on it but it had a very faint backlight (I would say about 3-5% of normal brightness). I was able to see that there is some backlight after I pressed on the lid close switch and the screen turned to completely black.
Here are my troubleshooting steps that I went through to find the problem.
First of all, I replaced the memory module and didn’t get any changes. Removed the wireless card, still had the same problem.
After that I removed the hard drive and started the computer. This time I got something. The notebook successfully passed the Toshiba screen and started looking for a boot device. I got some activity on the screen. To make sure that the notebook itself works fine, I booted it from Knoppix (live Linux CD) and successfully loaded the Linux operating system to the desktop. So, that’s the hard drive problem!
I installed the hard drive back in the laptop and tried to boot it again. The same failure occurred again; I got a black screen with a very faint backlight and no hard drive activity at all. I tested the hard drive with Hitachi DFT test and failed an advanced test. The problem is detected!
Finally I installed a new hard drive, reimaged the drive with a recovery DVD and got the laptop back up and running.
By the way, even though the customer’s hard drive failed the DFT test, I still was able to access it from another computer. The customer had important personal files on the failed drive. I connected it to our recovery desktop computer using IDE adapter. The “failed” hard drive was detected without any problem and I was able to recover the data.

                                                                               by laptoprepair101