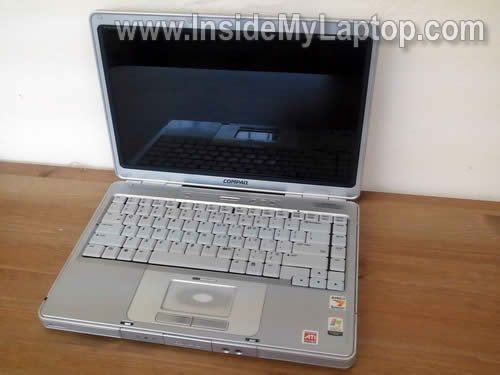
In this guide I explain how to remove and replace LCD screen with inverter board in a Compaq Presario v2000 laptop. Also, you can use this guide for removing and replacing the keyboard.
Most likely this guide will work for some other Compaq Presario models. If it works for you please mention the model number in comments after this post.
In order to take apart the display panel and access LCD screen, it’s necessary to separate the display panel assembly from the laptop base.
Before you start, make sure the laptop turned off and battery removed.
STEP 1.
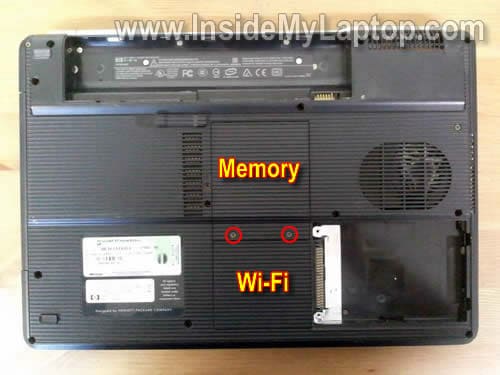
Remove two screws securing the memory and wireless card covers. Remove both covers.
STEP 2.
Remove two screws securing the keyboard cover in the battery compartment.
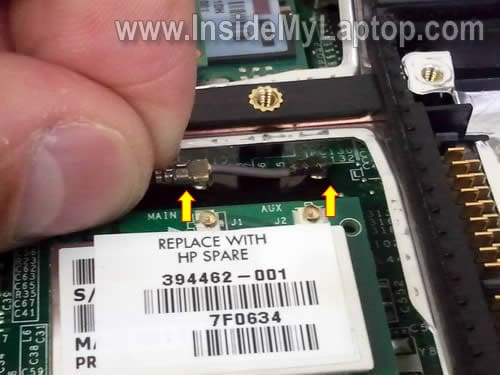
For the purpose of my guide it’s not necessary remove memory modules and wireless card, but it’s necessary to disconnect antenna cables from the wireless card.

STEP 3.
Disconnect both antenna cables from the wireless card.
STEP 4.
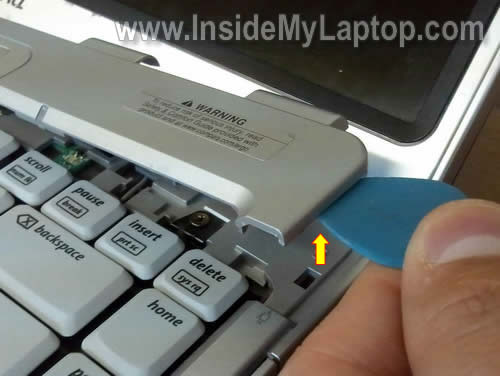
Using a piece of soft plastic (I’m using a guitar pick) lift up the right side of the keyboard cover.
Continue removing keyboard cover with your fingers.
STEP 5.
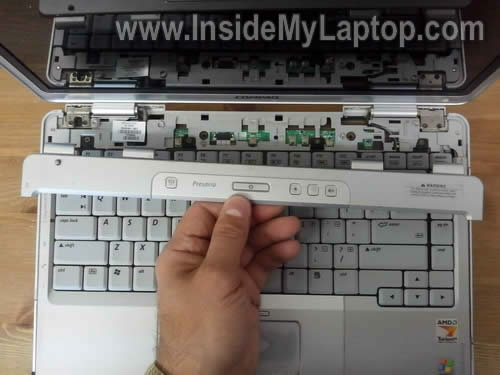
The keyboard cover has been removed.
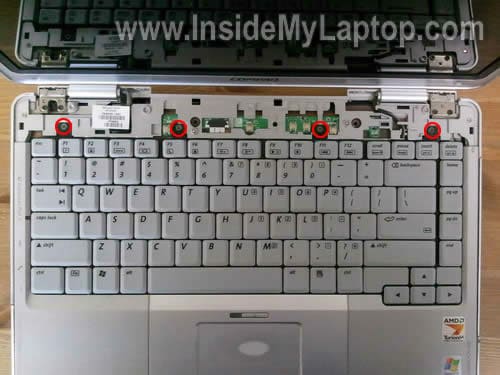
STEP 6.
Remove four screws securing the keyboard.
STEP 7.
Carefully lift up the keyboard.
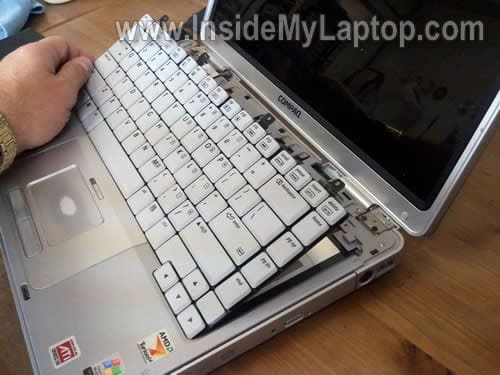
The keyboard connected to the motherboard.
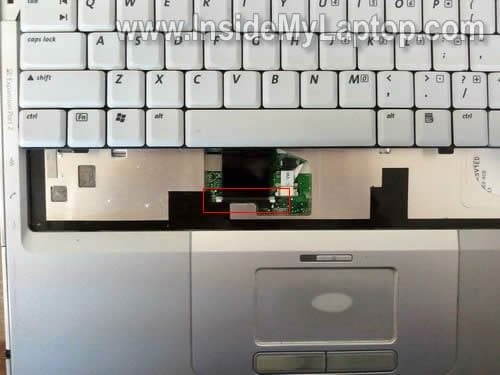
STEP 8.
For the purpose of my guide it’s not necessary to disconnect the keyboard cable.
Simply turn the keyboard upside down and place it on the palmrest.
Here you can find a new keyboard for Compaq Presario v2000 laptop.
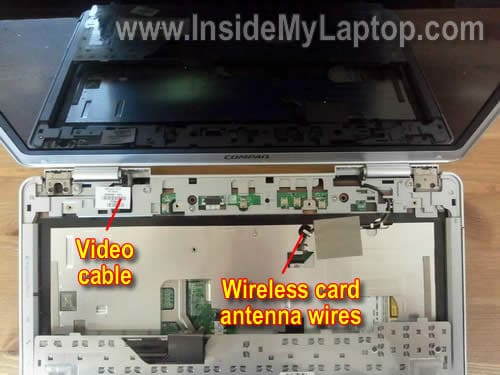
STEP 9.
Carefully pull the wireless card antenna cable though the opening in the top cover.
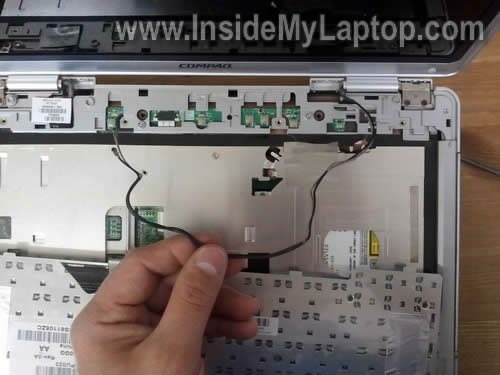
STEP 10.
Unplug the video cable connector from the motherboard.

STEP 11.
Remove four screws securing display hinges to the laptop base.
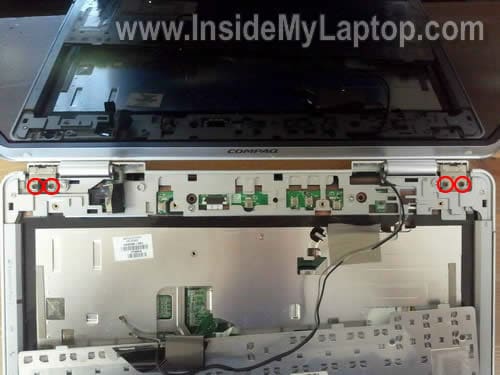
STEP 12.
Carefully separate display panel from the laptop base.
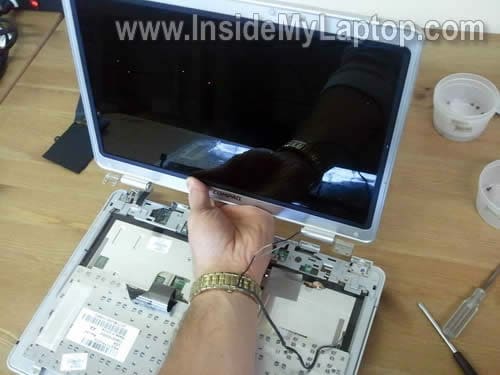
TAKING APART DISPLAY PANEL AND REMOVING LCD SCREEN WITH INVERTER.
STEP 13.
There are six screw covers on the screen bezel.
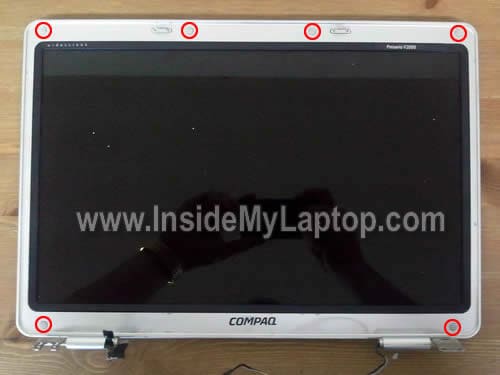
Remove screw covers with a sharp object and remove all six screws found under those covers.
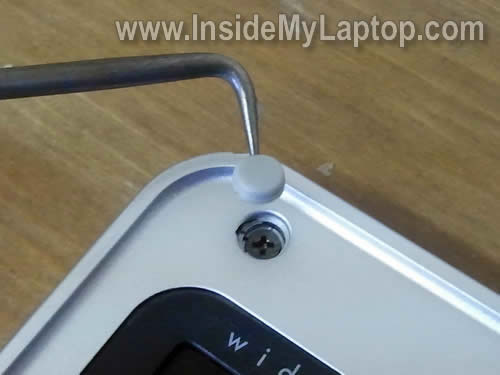
STEP 14.
Start separating the screen bezel from the display cover with your fingers.
A piece of soft plastic (guitar pick in my case) will help you to separate the bezel.
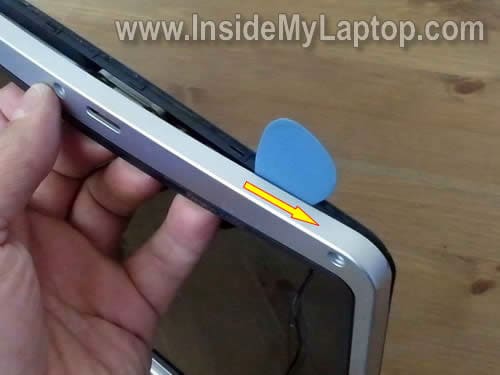
STEP 15.
Continue separating screen bezel on the top of the display assembly.
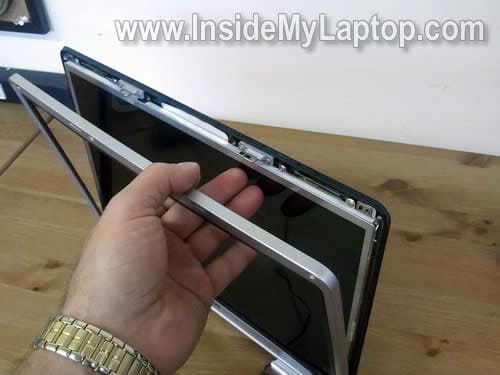
STEP 16.
Now move to the bottom part of the display.
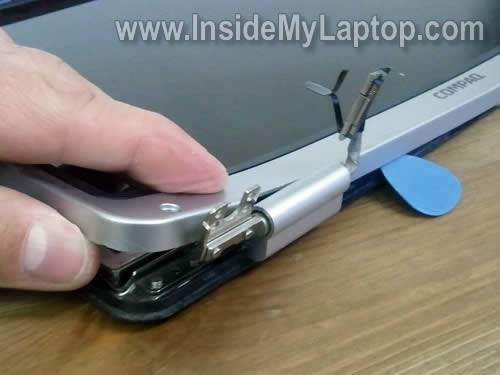
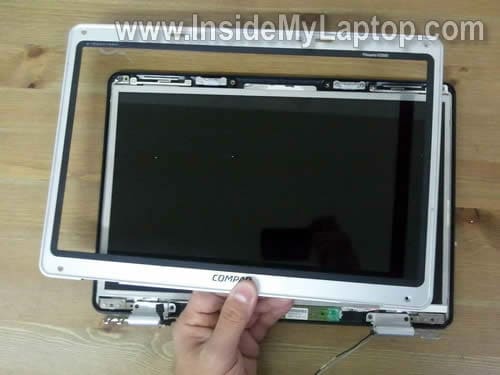
STEP 17.
Screen bezel has been removed.
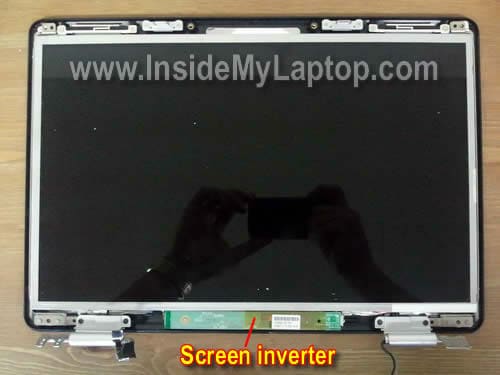
STEP 18.
The inverter board mounted below the LCD screen.
By the way, the inverter board works as a power supply for the backlight lamp inside the LCD screen.
If the laptop screen suddenly went very dark or backlight started flickering, most likely this is inverter board failure. Try replacing the inverter board first.
If replacing the inverter board didn’t help, probably this is failed backlight lamp inside the screen.
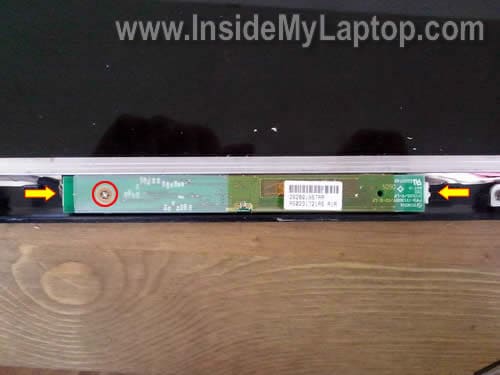
Remove one screw securing the inverter board.
Unplug cables from both sides of the inverter.
STEP 19.
Now you can remove the inverter board and replace it with a new one if needed.

STEP 20.
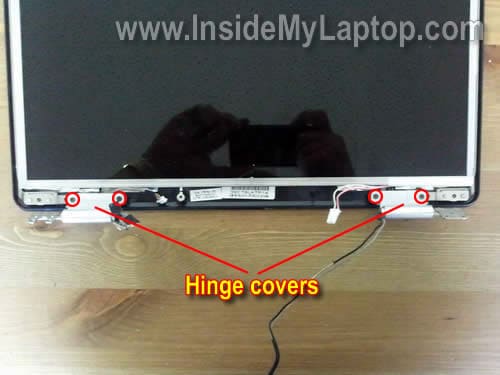
Remove four screws securing display hinge covers.
STEP 21.
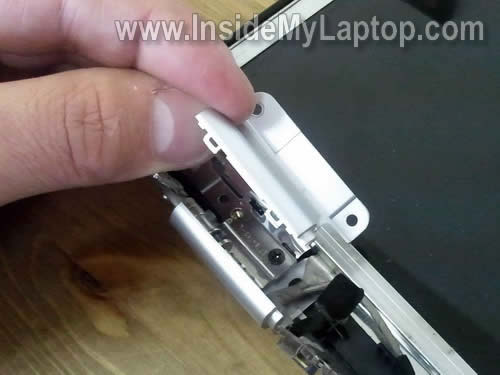
Remove both display hinge covers.
STEP 22.
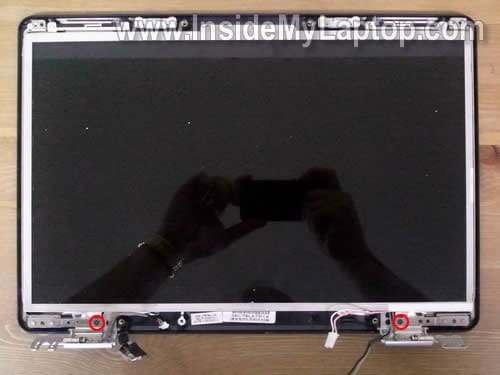
Remove two screws securing display hinges to the back cover.
STEP 23.
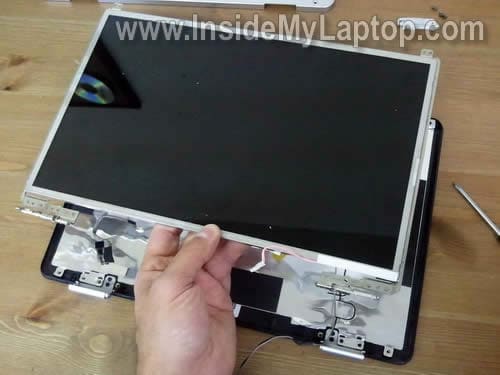
Carefully remove the LCD screen assembly.
STEP 24.
On the back side of the screen you can access the video cable.
Disconnect the video cable and transfer it to the new LCD screen.
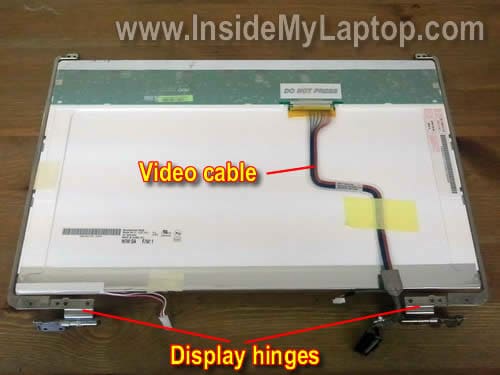
STEP 25.
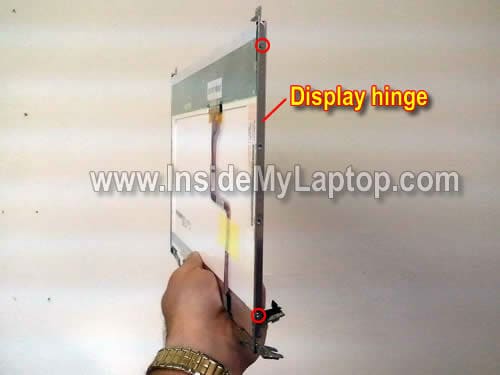
Each display hinge securing to the LCD screen with two screws.
Remove screws and remove both hinges. Transfer them to the new LCD screen.
Compaq Presario v2000 hinges.
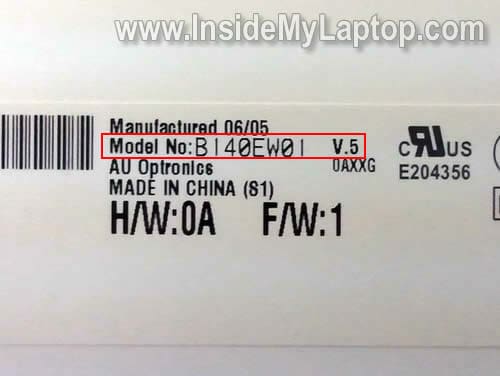
You can find a new LCD screen for your Compaq Presario v2000 laptop here.
Search for a new screen by the model number printed on the back of your screen. In my case the LCD screen model number: B140EW01.
by insidemylaptop
Nice Blog! Well most of your content and image is original and informative. /many thanks for sharing this, cheers.
ReplyDeleteLaptop Screen Repairs